
Wiring up an extractor fan is a simple process and, if done correctly, you can avoid potential hazards and accidents.
Don't cut corners!
What you may need:
- Circuit breaker
- Circuit tester
- Chisel
- Electrical Wire
- Electrical Screwdriver
- Plaster
An extractor fan is a mechanical fan that draws away smoke, steam and unpleasant smells from kitchens or other rooms. It is excellent at helping to help remove moisture and unwanted odours from your home or office. The right extractor fan will also help to prevent problems with damp.
Building regulations that came into force April 2006 dictate that extraction ventilation has to be fitted into kitchens built prior to that date. For more information visit the government’s Planning Portal page.
You need to choose the type of fan that meets the right extract rates and also suits the installation location e.g some fans, such as inline, will need to be installed halfway between the intake and exhaust vents.
The 3 main types of bathroom extractor fan to choose from are axial, centrifugal and inline. Axial fans are usually the least powerful, but fine for most situations. They should not be ducted more than 2-3m. This means they should really only be installed on a wall with direct access to outside. To duct your fan more than this distance, you need to look at the centrifugal version - more powerful than axial fans and good for bigger bathrooms, but they can possibly make more noise.
Centrifugal extractor fans are generally used in buildings that need elongated ducting. They are popular in commercial and industrial properties and work by turning the air through a 90-degree bend inside the fan which increases air pressure, and therefore the power of the fan.
Inline fans can, technically, be either axial or centrifugal but they aren’t installed on walls and ceilings, instead, they’re placed in the void or attic space above a ceiling. They are more powerful than centrifugal fans and are highly capable of providing high performance ducting over large distances.
Whatever fan you choose should include the manufacturer's guidance on install location.
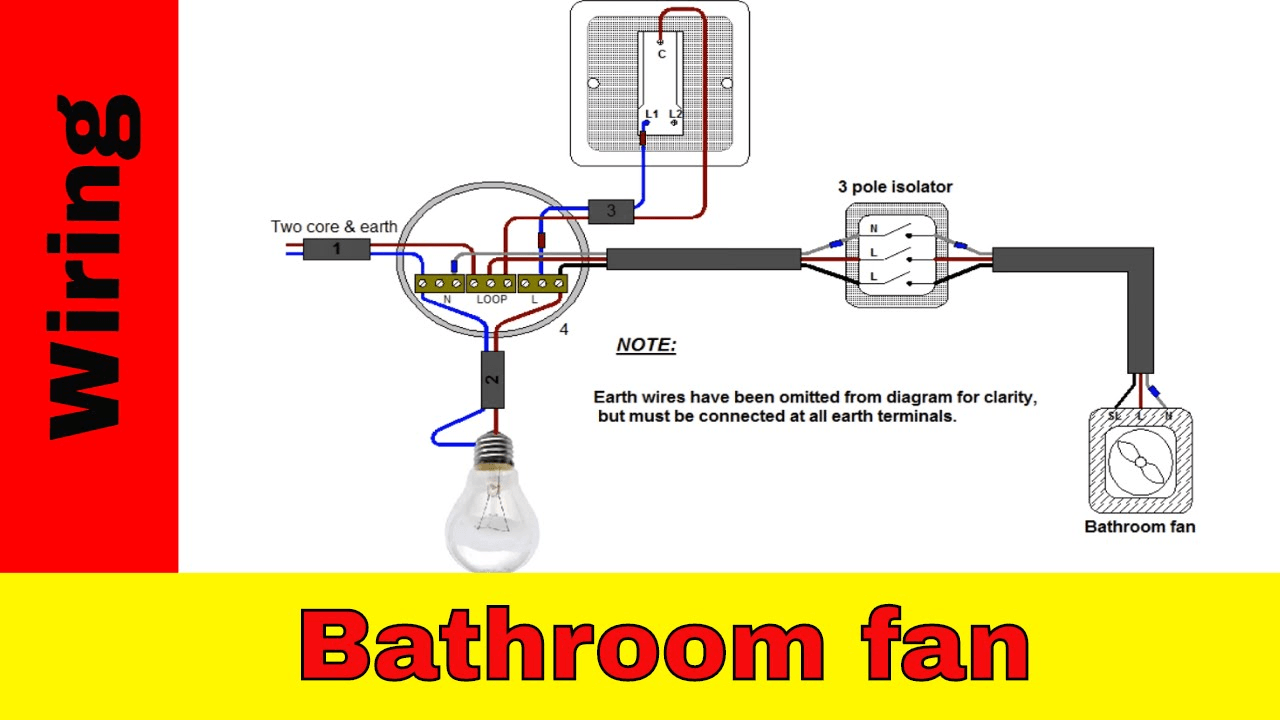
How to install the fan - wiring
Installing A Bathroom Fan
- Find the right CFM (Cubic Feet per Minute) or (Meters cubed per hour) rating for your bathroom. This is the first thing you need to do when installing a new bathroom fan so that you can buy the correct fan strength. Bigger bathrooms might need fans with a higher CFM
- You need to consider is the sound rating of your new fan, which is measured in sones. New fans generally have a sound rating between 0.5 (very quiet) and 6 (very loud) sones.
- Location - The location is important. It should be installed at the centre point between your shower and toilet for maximum ventilation. If your bathroom is very large, though, you may need to install more than one fan.
- Consider the layout of your attic. The fan should be placed in the space between two joists, free from any pipes or obstructions. In the case of replacing an old fan, the best thing to do is put the new fan in the same location (unless you have a good reason for putting it somewhere else).
- Get your tools
- Screwdriver
- Combination pliers
- Power Drill
- Pad Saw
- Get your materials
- Flexible Duct Pipe
- Vent Cap
- Screws
- Caulk and Wire Nuts/Connectors
Method
The following method is for reference and ideas on a solution actual installation method will depend on the construction of your home.
1. Installation - Drill a hole for reference and then mark the ceiling. Use your power drill and use an extra-long, 3⁄4 inch (1.9 cm) spade drill bit to drill your reference hole where you intend to place the fan. Measure the vent fan housing.
In the attic, find the reference hole and clear the insulation surrounding it away Using the fan housing measurements ensure the fan will fit in your chosen spot, between two joists.
In the bathroom, measure the fan's intake port. These dimensions will allow you to cut the appropriate sized hole in the ceiling.
Using a framing square and pencil, mark the outline of the fan's intake port on the ceiling, using the measurements you just took
2. Using a pad saw, cut out the portion of ceiling you’ve marked. Instead of a jigsaw, you can also use a reciprocating/drywall saw. Using your free hand, support the rectangular piece of ceiling and gently lower it to the floor.
3. Put the fan into position but before you lower the fan into the hole attach a 90-degree duct elbow (to which you will later attach the duct pipe) to the correct outlet port using foil duct tape.
Insert a cable connector through the removable knockout hole on the side of the fan's housing, and then slide the supporting metal brackets into place. Centre the fan over the ceiling hole and lower it into place, ensuring any connection points are correctly orientated.
4. Securing the fan to the joists - Once positioned correctly, extend each of the metal brackets of the fan until they reach the joists on each side of the housing unit. Secure each bracket with drywall screws.
Having secured the fan now take the length of flexible duct pipe and attach one end to the 90-degree duct elbow protruding from the fan housing using the foil duct tape.
(This is a good time to run an existing or new electrical cable through the connector on the housing of the fan. Secure the cable by tightening the screw on the connector but be aware that if your fan includes a light you'll need to use a three-wire cable).
5. Finding a suitable exit point for the duct pipe. Find the shortest, most direct route from the housing fan to the outside. Longer duct pipe means less efficiency from the fan.
It is absolutely essential to vent the fan exhaust outside. Venting it directly into the attic would encourage mould growth and potentially cause the rafters to rot.
6. Attaching the vent cap - For an exit point on the side wall, pick a point between two wall studs and take some reference measurements on the inside so you can find the same point on the outside. Use a 4-inch hole saw to cut through wall from the outside and then secure the vent cap in place.
In the attic, attach the end of the duct pipe to the vent cap's connector duct using the foil duct tape.
7. Wiring the connections in the housing unit - You may need to wire the connections from the attic or from the bathroom depending on the type of fan. Be sure to read the manufacturer's instructions and make certain that the power is off before going any further.
We would always recommend any electrical work should be done by a professional.
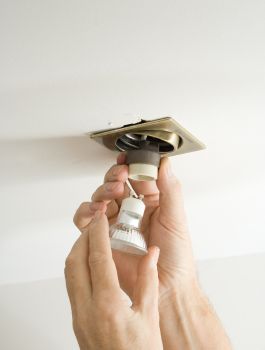
8. You’re almost done. Now, attach the grille and plug the blower motor into the electrical receptacle and, using the screws provided, make it secure.
Place the mounting wires of the decorative plastic grille into the available slots in the housing unit, making sure it’s sitting flush against the ceiling -- create more tension by spreading the mounting wires, if needed.
Turn the power back on and test the extractor fan to make sure it's working.
Flexible pipe, if not fitted correctly, can become a trap for condensation and end up full of water! If the flexible pipe is supported and tight this won't happen. If possible use solid pipe


 Hate
Hate
 Dislike
 Neutral
 Like
Like
 Love
Love