Some Simple Steps To Fixing A Broken Solar Light
Blog
Start by testing the light, just to be sure that it is indeed broken by covering the solar panel, making the unit think it is night time and, if the solar light is in good working order, it'll work.
Sometimes the problem could be something quite simple, such as another source of light hitting the solar panel, giving the impression that there is still daylight. A quick remedy for this situation is to place the panel somewhere where this particular light source can’t get to it. If, however, the answer isn't so straight forward here are some potential solutions:
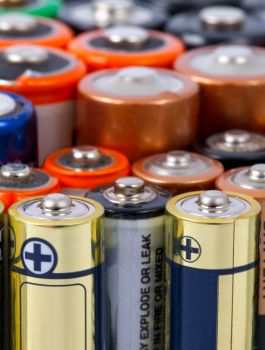
Battery Replacement - Some outdoor solar lights come with rechargeable batteries which charge when it's light and then use the stored energy at night. Rechargeable batteries do, unfortunately though, lose their charging ability so if you notice that the light stays lit for shorter periods of time, even after being fully charged, it’s a safe assumption that this is the issue. The lifespan of a good quality battery is approximately two years.
Beware Of Shadows - Shadowed areas over the lights’ solar panel is a big no-no, particularly in and around midday when the sun is at its highest. Check the solar panel every couple of months to see that it isn’t affected by too much shade at this time of day. If you’ve fitted your solar panel in the middle of summer, this is when the shadows will be at their shortest but as seasons change and the sun gets lower in the sky, shadows get longer.
The Angling of Your Solar Panel - The angle of the solar panel is a key element in the length of time your light will burn. This is particularly true during the winter months when the sun is at its lowest. The optimal angle for your panel is 45°.
Is It Facing South? - Just like satellite dishes, solar panels work best when pointed in the right direction. The sun rises in the east and sets in the west so having your panel south-facing will allow it to get sunlight from the morning right through to evening time. Your solar light will work even if not facing south but it won’t be at full capacity.
Water Ingress/Intrusion - A Solar light can have issues with water ingress but a well designed solar light shouldn't suffer these problems. Check the IP rating before buying, look for the rating which will provide the best protection
If you do end up with a moisture problem here are some things you can do:
Take off the light covering and check for moisture buildup, then put the solar light in your airing cupboard for a day or two to help it to dry out. When putting it back together check that the batteries are in place and charge it for a few days before using again.
Keep to the manufacturer's instructions. If your unit has been correctly installed and includes a warranty with a water ingress stipulation, getting in contact with the manufacturer with photographic evidence of the problem so they can replace your light shouldn't be an issue.
On/Off - Does this one seem really obvious? Some solar lights have power switches, so, for these models, make sure it is in the ‘on’ position.
Is It Plugged In? - Again, seemingly obvious but people still make this basic mistake. Some outdoor solar lights have the batteries in the solar panel and some have them in the head of the light but essentially it boils down to the same thing - if a battery can’t charge or there’s not enough charge getting from the battery to the lamp then it won’t work to its maximum capacity.
Using mains power - using a mains charger or taking the batteries out to charge them by the mains is only a good idea as long as you use the one that came with the light. Solar panels have a very specific voltage, compatible with the circuitry and voltage of the battery. The wrong mains charger could damage the circuits or charge the batteries too much, irreparably damaging your light.
Passive (PIR or infra-red) Solar Lights - Some of the more advanced solar lights have finely tuned sensitive motion detectors which can be programmed so that your pet or other small animals won't set it off. Factors to consider when installing a solar light:
The height at which you are planning to install the unit
Its’ proximity to the movements you’re aiming to have it detect
Whether the motion moves across the field of view of the PIR
If your solar light doesn't work when needed, start a test run, beginning with the highest level of sensitivity and reducing the strength bit by bit until the light is working at the level you want.
Charging behind a window - Although we could easily sit at a window and get benefits from the sun, the same can't be said of solar panels. More often than not, modern homes have double and even sometimes triple glazed windows, so the rays of the sun hitting the solar panel are completely useless. Outside is always the best place to position the panel, with adequate access to sunlight.
Grubby solar panel - You might sometimes find the performance of your solar panel dipping over time due to a buildup of dirt and dust. A quick clean using a damp cloth every now and then will remedy that.
Cleaning the lights’ cover - Clean the see-through casing both inside and out with soapy water, get rid of any bugs, and dry it off.
If, after following these steps, your unit still isn’t working it may be time to get in touch with the company. Your warranty is still valid you should be given a replacement without any issues.
A Step Further:
Before taking any further action you first need to be aware that interfering with the internal workings of your solar light and panel will invalidate your warranty but if you’re confident enough that you can deal with the problem and none of the above fixes have worked then here’s what to do:
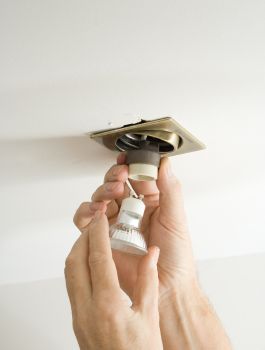
Take The Light Fitting Apart - The majority of lights are held together with screws fitted around the edges which will need to be removed. The covering of the light which is usually glass or plastic may twist apart so don’t forget to check for that.
Once opened, take away any large removable parts, making sure you take note of how to reassemble them for when you’re finished. If the unit has rechargeable batteries then remove these also (recharge the batteries once removed). If they are soldered into place then leave them where they are.
The circuitry - Check the circuit for any damage. Look for something that could be preventing the circuit from working such as broken wires or rust. If you can, try and replace the damaged parts. If you don’t have a soldering iron and spare wires then, using wire cutters, strip the wires back and twist the ends together. If you have a broken switch, cut it out and again twist the wires together. If the LED is dull, consider removing it and replacing it with a like for like LED.
Re-assembly - Put the now repaired and cleaned parts together again, as well as the batteries which, at this point, should be at least partially charged. Put your finger over the resistor which is usually found next to the panel, then switch it on. If the LED lights up then you have successfully fixed your solar light.
Posted on:
January 14, 2019
Last Updated on
April 15, 2020 11:52
Read More Articles
What Is The Running Cost Of A Heated Blanket?
February 03, 2023
Commonly Asked Questions, How to Calculate Running Cost, and Safety Tips.
Read More...
January Sales
January 11, 2023
January is a time for new beginnings, and what better way to kick off the new year than with a sale?
Read More...
Christmas Tree Lights Electricity Cost
November 11, 2022
Commonly Asked Questions, How to Calculate Power Usage, and Energy Saving Tips.
Read More...
Heated Airer vs Tumble Dryer
November 11, 2022
Let’s explore the difference between the Heated Airer and Tumble Dryer along with the benefits of each.
Read More...
How Much To Feed A Cat
March 13, 2024
Obesity is an increasing issue for pets in the UK and overfeeding a cat can lead to a series of health problems.
Read More...
Choosing an Electric Vehicle
November 11, 2022
Choosing an EV by mileage and energy consumption. The highest efficiency electric cars today achieve 4 miles per kWh or above.
Read More...
How Much Play Sand Do I Need?
November 02, 2022
Frequently Asked Questions, Tips to ensure your sand lasts longer, and How much play sand do I need?
Read More...
How To Save Money When Cooking
October 24, 2022
We have compiled some tips to help save energy costs when cooking.
Read More...
How To Choose The Right Instant Water Heater
October 11, 2022
What are the different energy types of water heaters available? How do you choose the right instant water heater?
Read More...
How To Measure Audio Quality
September 26, 2022
Here are the answers to all your questions about audio quality.
What is audio? Audio is sound within the acoustic range available to humans.
Read More...
Choosing an EV Charger
July 08, 2022
What are the different types of chargers & cables? What are the different charging speeds? Find the answers to these EV questions.
Read More...
How many lights should I put on the Christmas Tree?
December 20, 2021
Our Christmas Tree Lights Guide for how many lights, and which type of lights, you should put on the Christmas Tree.
Read More...
Wiring a Security Light
December 20, 2021
Our easy guide to replacing an existing outside light with an LED security light.
Read More...
Replacing a Cooker or Electric Hob
December 20, 2021
Follow our guide for help replacing a cooker or electric hob
Read More...
Wiring A Shower
December 20, 2021
Follow our guide for help installing an electric or power shower.
Read More...
Independent Review of Carnilove Dry Dog Food
March 06, 2020
AllAboutDogFood.co.uk awarded Carnilove dry dog food 4.9 out of 5.
Read More...
Independent Review of SpiderEx Spray
January 10, 2020
PSI conducted an independent review of SpiderEx spray.
Read More...
Battery Size Chart
December 04, 2019
To help our customers find the correct battery we have put together a guide that helps you measure your old battery against the new batteries we sell.
Read More...
Recycling | WEEE Regulations
November 27, 2019
As a retailer, we take out responsibilities of recycling old appliances very seriously, and we support the WEEE (Waste Electrical and Electronic Equip
Read More...
Dehumidifier Types
November 20, 2019
A guide on choosing the right dehumidifier that will help you live in a clean environment that is free of pollution.
Read More...
National Minimum Wage for Apprentices
November 06, 2019
A National Minimum Wage (NMW) refers to the lowest level of pay that is legally allowed. In most countries, NMW gets set at an hourly rate considerin
Read More...
What makes Sparks/Electrician's Screws (Square Screws) So Great?
October 18, 2019
We explore the origins & benefits of square screws.
Read More...
Noise Regulations in the UK
October 11, 2019
The Department for the Environment, Food and Rural Affairs is continuously working hard to curb noise pollution in the UK.
Read More...
Getting rid of bed bugs by adjusting room temperatures...
September 25, 2019
There are different approaches to getting rid of bed bugs, but it’s left to individuals to weigh the pros and cons of each method.
Read More...
New Wiring and Cable Colors – United Kingdom
September 17, 2019
The standard colors of wiring in the United Kingdom changed officially on March 2004, but the start of changes happened before this date.
Read More...
Fire-rated downlighting and the need for safety
February 27, 2019
Fire-rated downlighting is designed to maintain the integrity of your ceiling should a fire break out but for more information continue reading..
Read More...
What exactly is an air conditioner?
February 04, 2019
Essentially the purpose of an air conditioner is to cool the home or business. Read on for more details.
Read More...
Cabling - What Do I Need & Why?
January 21, 2019
It’s important to choose the right cable for specific purposes, so why not check out our short guide that should help:
Read More...
Do I Use Tarpaulin Or Patio Furniture Covers?
January 21, 2019
Protecting your outdoor furniture when not in use is tricky so how do you keep them dry, secure and in good condition?
Read More...
Landlords - Smoke And Carbon Monoxide Regulations
January 15, 2019
Have you ever wondered what the legal requirements are regarding smoke detectors and carbon monoxide detectors within a rented property?
Read More...
The Deadly Truth About Carbon Monoxide
December 20, 2018
Carbon monoxide or 'The Silent Killer' is colourless, odourless and tasteless and if you want to avoid it there are facts that you need to know.
Read More...
IP Ratings Explained
December 05, 2018
The universal IP Rating gives buyers the confidence to use their devices, safe in the knowledge that their product is of sound quality.
Read More...
Lot 20
November 21, 2018
Lot 20, a new legislation from the EU, has been created to remove inefficient technologies and reduce energy used by home heating products.
Read More...
What Size Of Electric Heater Do I Need
November 12, 2018
Electric heating is efficient because the energy is converted directly to heat. How to decide the amount of heat and size of electric heater you need?
Read More...
Solar Or Wired Outdoor Lighting - which to choose?
November 05, 2018
With so much choice in garden lighting, power options are a major consideration. Which to choose - wired garden lights or solar?
Read More...
Choosing The Right Bathroom Fan
October 23, 2018
There are a lot of things to take into consideration when choosing the right extractor fan so follow our guide to get the information you need.
Read More...
Adding Outlet Switches To An Older Home
October 23, 2018
Adding new outlet switches to your old home? Use products designed for easy installation and follow our easy guide.
Read More...
Hooking Up Outdoor Floodlights/Motion Lights
October 04, 2018
Here's our useful guide to hooking up your outdoor lighting. Whether it's floodlights or motion sensors, we have information covering it all.
Read More...
Check to see if your wiring is old/damaged
September 28, 2018
Old and poorly wired electrical appliances can be dangerous so you need to know what to check for so you don’t put everyone at risk.
Read More...
Connecting Extractor fans
September 24, 2018
Wiring up an extractor fan is a simple process and, if done correctly, you can avoid potential hazards and accidents.
Read More...
How To Reset A Circuit Breaker
September 20, 2018
It's best to understand what type of device has just tripped to help you understand the underlying problem. Then begin to reset your circuit breaker.
Read More...
Planning your Garden Lighting!
September 19, 2018
It can be hard to choose the right style or technology of lighting appropriate for your home or commercial garden but we're here to help
Read More...
Choosing The Best Caravan Leads!
September 19, 2018
There are a few things to consider when choosing a suitable caravan lead, but follow these tips and you should end up with the right caravan solution.
Read More...
What do I Need?: Air Purifier Vs Dehumidifier
September 18, 2018
Ever looked into dehumidifiers or air purifiers but didn’t know enough about them or how to pick the right one for you?
Read More...
Top 5 Uses For C-Tec MultiSolve!
September 17, 2018
CT1 & MultiSolve are a must have for all bonding, grouting, and sealing jobs. But how can MultiSolve help the everyday user at home?
Read More...
5 Hacks For Brilliant Home Lighting
September 14, 2018
5 Great Hacks To Get The Best From Your Home Lighting
Read More...
Storage heater vs Panel heater – which is best for you?
September 14, 2018
Storage heater vs Panel heater – which is the best option for you?
Read More...
Hate Trailing Plugs? Learn how to wire a USB socket now
September 13, 2018
Hate Trailing Plugs? Learn how to wire a USB socket in less than thirty minutes!
Read More...
How to install a dimmer switch
September 10, 2018
How to install a dimmer switch
Read More...
T4 vs T5 - Which Is Which?
August 27, 2018
T4 and T5 fluorescent tubes are ideal for home and commercial use for kitchen worktops, in cabinets, under stairs or as a pelmet lamp.
Read More...
I Need Home Security - Where Do I Start?
August 14, 2018
Do you feel the need for home security but don't know where to start? Here is some helpful information to let you make an informed choice.
Read More...
Can I use a bigger Wattage LED in my light fitting ?
August 12, 2018
A common question in replacing incandescent bulbs with LED equivalent: “Can I use an LED that has a higher wattage equivalent than my fixture allows?”
Read More...
Telephone Sockets And Their Wiring Explained
August 08, 2018
Telephone socket wiring explained in simple terms
Read More...
Garage Security: Keeping Thieves Busy
July 23, 2018
We discuss our favorite garage security tips and tricks to keep thieves out, and make things more and more difficult for them to get around
Read More...
Alarm Panel Fault Checklist
July 23, 2018
Find out how to DIY diagnose your Alarm Panel Fault or Electrical Error Before Calling your Electrician on MyElectricalWorld!
Read More...
UK & Ireland Gas Regulator Differences
July 23, 2018
Decide which UK or Irish gas regulator hose you need for propane or butane gas canisters & gas cabinet heaters on myelectricalworld.com!
Read More...
DIY Spotlight: Installing an Instant Hot Water Tap
July 23, 2018
We discuss fitting & installing a Hot Water Tap in your home, garage, or workplace for a great pop up water heating solution.
Read More...
Spotting Counterfeit Fuses!
July 23, 2018
Want To know how to tell the difference between Genuine BS1362 fuses and Counterfeit Fuses? Read our article to learn more now!
Read More...
Pop Up Security! Easy DIY Door Contact Sounder System
July 23, 2018
We show you how to wire your own cheap door contact DIY alarm system Without An Alarm Panel! With a few simple low cost parts and basic tools.
Read More...
EE Solutions: DIY Packing Machine!
April 19, 2017
Every day on-site at Electrical Europe we are looking for new and more efficient ways to deliver a stand-out service to our global customer base.
Read More...
AWG to MM Cable Conversion Guide
January 19, 2017
When buying wire or cable many UK and international buyers face difficulty when confronted with AWG sizing.
Vice Versa, American buyers may
Read More...
New Brands Announced
July 27, 2016
Welcoming Sealey, Schneider, Fitzgerald & Hi-Spec To Our Roster
Read More...
Electrical Europe Director
April 08, 2016
When I started out in business I didn’t envisage doing business online, but this is where the growth opportunities are..
Read More...
EE - Now Hiring!
May 27, 2016
Considering a career in online wholesale? Exciting opportunities in the world of online commerce with Electrical Europe
Read More...
Janurary Product of The Month - Dimplex MPH500
January 14, 2016
The Dimplex MPH500 to prevent Flooding due to frozen pipes
Read More...
Zexum Cables - Made in the UK
April 21, 2016
Zexum's UK manufacturing team get the job done - No outsourcing required.
Read More...
NEW Smoke & Carbon Monoxide Alarm Legislation for Landlords
September 28, 2015
From 1st October 2015, landlords are required by law to install Smoke & CO Detectors.
Read More...
The Best Electric Heating for your Home
September 18, 2015
Comparison of Panel, Storage, Bathroom, Towel Rail and Radiator Heaters
Read More...
Buying From Electrical Europe
September 16, 2015
Quality Brands, Massive Range, Rapid Dispatch & Flexible Returns Policy.
Read More...
Everchanging World Of Solar
September 15, 2015
The change of heart to renewable energy by the government?
Read More...
Dimplex - Heating Home & Business
September 11, 2015
Heating your Home & Business this Winter with Dimplex Oil Filled, Oil Free and Electric Heaters.
Read More...
HD-TVI vs Analogue
September 10, 2015
Difference in definition, quality, and clarity between standard analogue and 1080P HD TVI Cameras & Equipment
Read More...
LEC - Quality & Style
September 08, 2015
Capacity and durability for the family home, compact designs for smaller properties, or style and elegance for the modern apartment.
Read More...
Stockists of Elnur Heating
September 04, 2015
Electrical Europe are proud stockists of the whole Elnur Heating range including Storage, Panel & Infrared Heaters, Boilers and Thermostats.
Read More...
Bright Light with LED's
September 03, 2015
Large Range of Bulbs and Fittings to Lighten up your Home, Garage, Workplace or Commercial Premises.
Read More...
KnightsBridge Screwless Range in Stock
September 02, 2015
The Full Range of Screwless Switches & Sockets by KnightsBridge including Polished Chrome, Brushed Chrome, Polished Brass, Black Nickel & Matt Black.
Read More...
Why are we stockists of CK Tools?
September 01, 2015
Stockists of the whole CK Tool range including C.K Tools, C.K Magma, C.K Classic and Kasp Padlocks.
Read More...
Stockists of Duracell Batteries
August 31, 2015
Stockists for a wide range of Duracell batteries including the Industrial and Plus Power Ranges including A, AA, C, D and 9V PPE.
Read More...
Now Stocking Fumagalli Products
April 26, 2016
Revolutionary resin-molded products from Fumagalli are the low-maintenance high-toughness solution for all your outdoor lighting installations
Read More...
Now Stocking Redring products
May 05, 2016
Xpelair's award-winning water heating components are now coming to Electrical Europe - Saving you money and energy for all hot water to sinks.
Read More...
Blaupunkt TVs - Now Available on Electrical Europe
May 24, 2016
German manufacturer Blaupunkt brings practical function and practical cost to the television market.
Read More...
Hate Trailing Plugs? Learn how to wire a USB socket now
November 08, 2016
With the ever increasing number of portable electronic ‘necessities’ in our homes and in our pockets, it's easy to find yourse...
Read More...
9 Simple steps to a more secure home this Christmas
November 15, 2016
The christmas period leaves homeowners particularly vulnerable as the stakes get higher for poten...
Read More...
Win a 48L Wine Fridge Full of Coke!
August 23, 2016
Win a Lec Wine Fridge!
Read More...


 Hate
Hate
 Dislike
 Neutral
 Like
Like
 Love
Love